Exporting From Adobe Premier Pro
AAF
When naming clips and sequences in Premiere Pro, do not use special characters, accented characters, or characters that affect the parsing of an XML file. Also, do not use characters like /, >, <, ®, and ü.
1 - Set your in and out points for the length of your timeline. This should normally start at 10:00:00:00 or 09:59:30:00 if 20 seconds of bars and tone are included.
2 - Go to File > Export > AAF
3 - In the AAF Export Settings dialog box set the following:
‘Embed Audio’ writes the newly created audio files into the AAF export resulting in a single, self-contained AAF file. ‘Trim Audio Files’ along with a handle setting of 150 exports trimmed audio from the timeline which allows us to pull out up to 6 seconds of handle from edits if needed.
4 - Click OK, then choose a location for the export and Save. It’s a good idea to make a dedicated folder on a drive with plenty of space (with easily 20-50GB free) called something like ‘My Project Epnn - Exports For Audio’. This helps keep files for audio organised and easier to subsequently upload.
Video
1 - Attach any external drives etc. if not done already and create a folder for your exports.
2 - Select your final sequence in the bin to load it into the timeline.
3 - Make sure you have added BITC; the in-vision timecode generator can be found in the Effects window under Effects > Video Effects > Video > Timecode Drop this onto your top layer of video.
4 - Click on Export at the top left of the screen, or go to File > Export > Media.
5 - In the export window, turn on the MediaFile toggle button in the left hand sidebar, make sure all others are switched off.
6 - In the settings column in the middle, change the Format to DNxHR/DNxHD MXF OP1a
7 - Turn off the EFFECTS and METADATA toggle buttons.
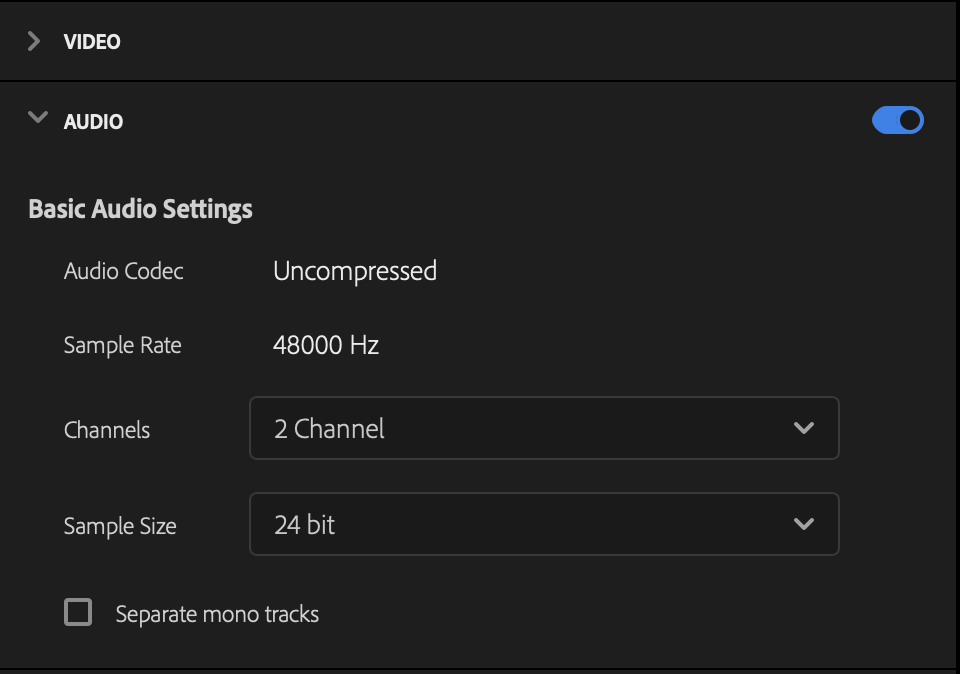
8 - Now check and adjust your other Video settings as below:
You can save all these settings for the future by clicking on the three dots ’...’ on the right hand side of ‘Preset: Custom’ at the top of the centre column. Name the preset something like ‘Video Export for Pro Tools’ and you can choose it from this menu next time you export.
Tracks are best exported as Video and Audio separately and in groups of up to four. The above example shows settings to export the first four audio tracks. Note the ‘EDL Title’ needs to include this information.
5 - Select up to four tracks you wish to export under the list of tracks at the bottom of the dialogue box.
6 - Name and save into the folder with your AAF and Quicktime files.
7 - Repeat for other groups of tracks
A typical set of EDL files might be something like:
My Sequence V1-3My Sequence A1-4
My Sequence A5-8
My Sequence A9-11
EDLs
1 - Make sure your ‘Tape Name’ column is populated in your project bin.
2 - Select your sequence in the Project Browser
3 - Go to File > Export > EDL
4 - Now check and adjust your settings as below:


